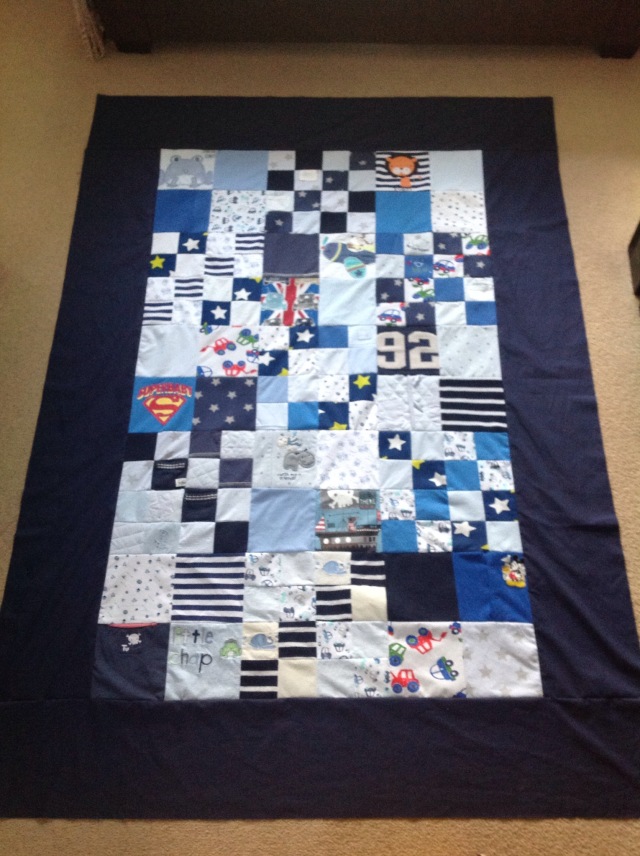
So it’s been two weeks since I posted about the memory quilt. That’s because not much has happened. As usual, I really thought I’d be finished by now, but life gets in the way. I’ll try and summarise what I’ve managed to do on it recently.
I’m having to rely on the dates on the photos (‘Moments’ in iPhoto) to prompt me. As it turns out, I didn’t do much last week.
On Tuesday, I took my rotary cutter to the bedlinen fabric I bought off ebay to make up the backing and the borders.

Wednesday, I attached the lengthwise borders.

Thursday, I attached the widthwise borders.
Having spent a bit of time researching how to finish a quilt without binding, in order to replicate the look of the memory quilts I’ve seen, I stumbled across ‘bagging out’. I’ve also seen it referred to as a pillow case finish. Depending on what I read, I needed to cut my wadding and backing slightly bigger than or exactly the same size as the quilt top! I got as far as cutting the wadding down and spray-basting the quilt top onto the wadding.
And then I did what I always do when I’m not sure what to do next: put it off.
Well, in actual fact, little man and I went to stay with a friend in Bristol for the weekend, whilst Mr Unfinished Crafter babyproofed the whole house. Very successful babyproofing. Not such a successful trip to Bristol. Little man showed his disdain for public transport by throwing up all over himself after his first ever bus ride. So, there we were, stranded in Bristol city centre with a baby covered in sick. And, of course, I’d forgotten a change of clothes. Then I returned to work on Monday after a whole year of maternity leave. I’m only working two days a week this year, then three days a week from next year. Anyway, I digress, back to the quilt.
After much procrastination, I was still unsure what to do. Should I quilt just the top and the wadding, so the backing was ‘clean’ like the memory quilts I’ve seen appear to be. I decided to quilt just the top and the wadding so I gave it a good iron to reactivate the glue in the spray baste. (Note, Children in Need Sewing Bee on in the background.)
I marked on the stars I’m going to quilt, with the aid of little man’s bath toy.
But then, I started to doubt myself. If the backing isn’t quilted, will it be loose from the top and wadding? I was going round in circles, so I consulted my crafty friends again.
I also ‘fessed up that I hadn’t washed the backing fabric. I was planning to wing it, but having doubts. Risky, we decided. So I washed the backing on a quick wash. And, guess what? The colour ran. Which was a problem, given that I’d used the same fabric for the borders and not washed that first either. So, out came the seam ripper and off came the borders. I’m not going to lie, it was soul destroying. But I did manage to catch up on The Apprentice in the meantime.
Borders and backing went for a spin In the washing machine and then enjoyed the autumn wind.
I then did a colour fastness test on a scrap of the (now washed) fabric and it passed. Phew. Out came the iron. Then the pins. Then the sewing machine. Borders are all now back on. Ready for the next stage. I just need to decide what to do next.


